How Long Does It Take to Walk Up Mount Maunganui
December 11, 2025

So, you’re thinking about tackling Mount Maunganui, eh? It’s a pretty popular spot, and for good reason. The views from the top are just something else. But like with any hike, people often wonder, “how long does it take to walk up Mount Maunganui?” It’s not a simple answer, really, because loads of things can change that. Your own fitness, the weather on the day, and even which path you decide to take all play a part. Let’s break it down so you can get a good idea of what to expect.
It’s a question that pops up a lot, isn’t it? When you first see Mount Maunganui, or ‘The Mount’ as everyone calls it, standing there so prominently, you naturally wonder about getting to the top. People want to know how long does it take to walk up Mount Maunganui because they’re planning their visit and need to fit it into their day. It’s not just about the physical effort; it’s about timing, especially if you’re hoping to catch a sunrise or sunset from the summit.
Most visitors are keen to make the most of their time, whether they’re on a short holiday or just a day trip. Understanding how long does it take to walk up Mount Maunganui helps with that. You might be thinking about:
It’s a pretty straightforward query, really. You see a beautiful natural landmark, and you want to know the practicalities of experiencing it. How long does it take to walk up Mount Maunganui is the first step in that planning process. It’s about managing expectations and making sure you have a good time without feeling rushed or unprepared.
The desire to know how long does it take to walk up Mount Maunganui stems from a simple need for information to plan an enjoyable and achievable activity. It’s about making sure the experience fits with your schedule and fitness level.
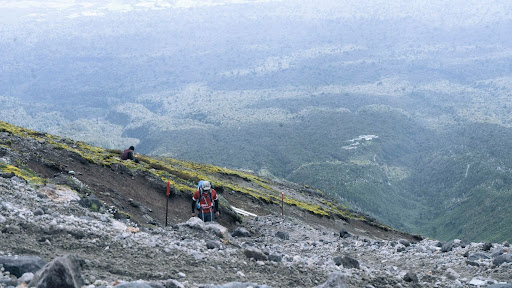
Mount Maunganui, or Mauao as it’s known locally, isn’t just one single path to the top. There are a few different ways you can tackle the climb, and each one will affect how long you’re out and about. It’s good to know what you’re getting into before you set off.
The most popular route for a quick ascent is the Summit Track, but it’s also the most demanding. This path is essentially a series of stairs, and while it gets you to the top relatively fast, it’s a real workout. For most people with a decent level of fitness, you’re looking at around 40 minutes to an hour to reach the summit this way, and then another 30-40 minutes to get back down. So, if you’re just doing the up and down, budget about 1.5 hours.
Then there’s the Base Track. This one is a much gentler, mostly flat loop that goes all the way around the base of the mountain. It’s about 3.4 kilometres long, and most people can stroll around it in about 45 minutes to an hour. It’s perfect if you’re not keen on a steep climb or if you’ve got younger kids with you. You get lovely views from down here too, and there are even spots to paddle or have a dip if the weather’s nice.
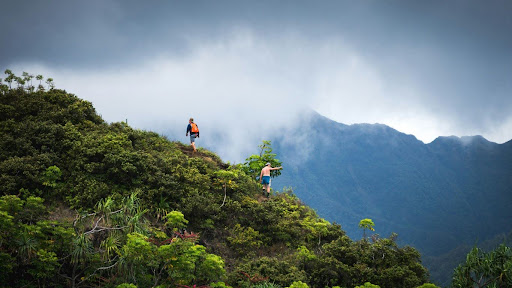
Beyond these two main options, there are a couple of other tracks that offer a middle ground. Some routes, like the Oruahine Track, start a bit steeper but then ease into a more gradual incline, often taking you along the cliff faces. These can be a bit longer than the direct summit track, maybe taking an hour to an hour and a half to get to the top, depending on your pace. They offer a different kind of challenge and some really spectacular views that you don’t get from the main stair climb.
Here’s a quick rundown:
Remember, these times are just estimates. Stopping for photos, taking breaks, or even just enjoying the view can easily add to your total time. It’s always better to allow a bit more time than you think you’ll need, especially if you want to really soak it all in.
Choosing the right track really depends on what you’re looking for from your visit. Are you after a quick burst of exercise, a stroll, or a bit of both with some amazing scenery thrown in? Knowing the different routes helps you pick the one that best suits your day.
Right then, let’s talk about your own personal engine when you’re thinking about tackling Mount Maunganui. It’s not just about the path itself, is it? Your own fitness plays a massive part in how long you’ll be out there, huffing and puffing.
For most people, the biggest difference will be between someone who walks regularly and someone who doesn’t get much exercise. It’s pretty straightforward, really. If you’re used to a bit of a workout, you’ll likely find the climb much more manageable and quicker.
Here’s a rough idea of what you might expect, depending on how active you are:
It’s also worth remembering that ‘fitness’ isn’t just about cardio. Strength in your legs and core makes a difference, too, especially on those steps. And don’t forget about age and any old injuries – they can all add a bit of time to your climb.
It’s always better to overestimate how long you’ll need. Rushing up a mountain isn’t much fun, and you miss out on the experience. Give yourself plenty of time, especially if you’re not sure how you’ll cope. There’s no shame in taking it slow and steady.
Right, let’s talk about the weather. It’s a bit of a game-changer when you’re planning your trek up Mount Maunganui, or ‘The Mount’ as the locals affectionately call it. You might be aiming for a brisk hour to the summit, but a sudden downpour or a blustery wind can really throw a spanner in the works.
The conditions on the day can easily add 15-30 minutes or more to your ascent time, not to mention making the climb feel significantly tougher. It’s not just about comfort; safety is a big factor too. Slippery paths after rain or reduced visibility in fog can slow you down and increase the risk of a tumble.
Here’s a rough idea of how different conditions might affect your climb:
It’s always a good idea to check the local weather forecast just before you head out. Even on a seemingly clear day, conditions can change quickly up on the mountain. Being prepared means you can adjust your plans, pack accordingly, and have a much more enjoyable and safer experience.
So, while you might have a target time in mind, be flexible. The mountain has its own agenda, and respecting the weather will make your visit all the better.
So, you’re wondering how long it’ll take you to conquer Mount Maunganui? Well, it really depends on who you are and how often you get your boots muddy.
For most people, a trip to the summit and back takes around 1.5 to 2 hours. But let’s break that down a bit more.
Here’s a quick look:
| Hiker Type | Estimated Round Trip Time | Notes |
| Beginner | 1.5 – 2 hours | Plenty of stops, steady pace. |
| Regular Walker | 1.5 hours | Consistent pace, fewer breaks. |
| Experienced Hiker | 1 – 1.25 hours | Fast pace, minimal stops. |
Remember, these are just averages. Factors like the specific track you choose, how many photos you stop to take, and even how busy the path is can all add time to your climb. It’s always better to overestimate your time than underestimate it.
So, you’re planning your ascent of Mount Maunganui, and you’re wondering what to pack. It really depends on how long you intend to be out there, doesn’t it? A quick dash to the summit and back is a different proposition from a stroll around the base, or perhaps a more relaxed climb taking in all the views.
For a shorter, more vigorous climb to the summit, say around 1.5 hours round trip, you’ll want to be prepared for exertion. Even for a quick hike, staying hydrated is key.
Here’s a quick rundown of what you might need:
If you’re planning a longer exploration, perhaps taking the Base Track or one of the gentler summit routes that might take closer to 45 minutes to an hour or more, you might want to add a few more bits and bobs.
| Item | Short Summit Trip | Longer Base/Gentle Summit | Extra Considerations |
| Water | 1 litre | 1-1.5 litres | Reusable bottle |
| Snacks | Small | More substantial | Energy bars, fruit |
| Sun Protection | Yes | Yes | Lip balm with SPF |
| Footwear | Good grip | Good grip | Comfortable socks |
| Warm Layer | Optional | Recommended | Light jacket/hoodie |
| First Aid Kit | Basic | Basic | Blister plasters |
| Camera/Phone | Yes | Yes | Waterproof bag |
Remember, the weather can change quickly up there. It’s always better to have an extra layer or a bit more water than you think you’ll need. Being prepared means you can focus on enjoying the incredible views and the experience of climbing one of the North Island’s most iconic spots. You can find some great trails, like the ones around Papamoa Hills.
For those planning a longer day out, perhaps combining a summit trip with a walk around the base, or if you’re just a slower walker who likes to take their time, consider packing a light waterproof jacket, especially outside of the summer months. A small backpack will make carrying everything much easier. And don’t forget your camera – the views are spectacular, and you’ll want to capture them!
Right then, before you even think about heading up the Mount, let’s have a quick chat about staying safe. It’s not just about how long it’ll take, but making sure you get back down in one piece, yeah?
First off, always tell someone where you’re going and when you expect to be back. It sounds simple, but it’s a lifesaver if something goes wrong. Whether it’s a mate, family, or even a quick message to a neighbour, just let them know your plans.
Here are a few other things to keep in mind:
Remember, the Mount is a beautiful place, but it’s still a natural environment. Respect it, be prepared, and you’ll have a much more enjoyable and safer experience. Rushing can lead to mistakes, so give yourself plenty of time and enjoy the journey, not just the destination.
When you’re thinking about heading up Mount Maunganui, timing can make a big difference to your experience. The best seasons for a climb are generally spring and summer, when the weather is milder, and the scenery really pops. You’ll find the paths are usually drier, and the views are clearer.
If you’re aiming for a truly special moment, consider a sunrise or sunset climb. Watching the sun dip below the horizon or peek over the ocean is pretty spectacular. Just remember, if you’re going up in the dark, a headlamp is a good idea. It can get a bit chilly at the top, even on a warm day, so a light layer is always wise.
Here’s a rough idea of what to expect depending on the time of year:
No matter when you decide to go, always check the local weather forecast before you set off. Conditions can change quickly, and being prepared makes the whole experience much more enjoyable and safer.
For most people, a mid-morning or late afternoon climb works well, avoiding the harshest sun and the biggest crowds. If you’re after a more solitary experience, early mornings or weekdays outside of peak season are your best bet.
Thinking about when to tackle your climb? The best time of day and year can make all the difference. For the most pleasant conditions and stunning views, consider the early morning or late afternoon. As for seasons, spring and autumn often offer a sweet spot, avoiding the harshest weather. Want to know more about the ideal times for your adventure? Visit our website for detailed guides and tips!
Most people take between 45 minutes and 2 hours to reach the summit, depending on the path they choose and how fast they walk. The easiest path around the base takes about 45 minutes, while the steeper summit track can take around 1.5 hours. It really depends on your fitness and how often you stop to admire the view!
Yes, there are a few ways up! The most popular is the Mauao Summit Track, which is quite steep with lots of steps. There are also gentler, alternative paths that wind up the mountain. For a really easy stroll with lovely views but no summit climb, you can take the Base Track, which goes all the way around the bottom.
The Summit Track is the one that goes to the very top of the mountain. It’s a bit of a workout, especially the part with many steps, and it takes about 1.5 hours for the round trip. The Base Track is a flat, easy loop that goes around the bottom of the mountain. It’s great for a relaxed walk and takes about 45 minutes to complete.
Absolutely! The Base Track is perfect for everyone, including families with young children or those who prefer a gentle walk. It’s a lovely 3.4 km loop with coastal views. If you want to go higher, the alternative summit routes are less demanding than the main steep track.
It’s a good idea to bring plenty of water, especially if you’re going to the summit, as the climb can be steep. Wear comfortable shoes with good grip, like trainers or hiking boots. Sunscreen and a hat are also recommended, as it can get quite sunny. If the weather looks changeable, a light jacket might be useful.
Many people love hiking up for sunrise or sunset to catch the spectacular colours. Mid-morning or late afternoon can also be lovely, as it’s often cooler than midday. If you’re looking for a quieter experience, try going early in the morning or later in the afternoon, especially on weekdays.